Apr 24, 2025·7 min
Email domain verification explained for product and marketing
Email domain verification explained in plain English: what it checks, what it misses, and how product and marketing teams can agree on signup rules.
Why domain checks matter (even if the email looks fine)
An email address can look perfect and still fail the moment you send a confirmation message. “[email protected]” has the right shape and passes a basic format check, but that doesn’t mean the domain behind it can actually receive mail.
The difference is simple:
- A real-looking email follows the usual pattern (name + @ + domain).
- A usable email points to a domain that can receive mail right now and isn’t likely to create problems later.
When teams skip domain-level checks, the problems show up downstream: bounce rates climb, fake or low-quality signups slip through (including disposable addresses), deliverability gets worse over time, and reporting becomes noisy.
A common scenario: a free trial launches and signups spike, but a chunk of users never click the verification email because it never arrives. Support tickets pile up, marketing blames the email tool, product blames “bad leads.” Often, many of those addresses were never reachable in the first place.
Email domain verification helps you catch this early. It checks whether the domain after the “@” is set up to accept email and can flag common risk signals (like disposable providers), so bad addresses don’t quietly pollute your database.
The goal isn’t to block people blindly. It’s to agree on acceptance rules that fit the business: what you allow, what you warn on, and what you reject.
What email domain verification is (and is not)
Email domain verification checks whether the domain part of an email address (the bit after @) looks capable of receiving email. It’s more than “does it look like an email?” and less than “is this a real person with a working inbox?”
Three ideas often get mixed up:
- Syntax check: Is the address written in a valid format (for example, [email protected]), with no illegal characters?
- Domain check: Does the domain exist, and is it set up to accept email?
- Inbox-level check: Does the specific mailbox exist (does [email protected] actually receive mail)?
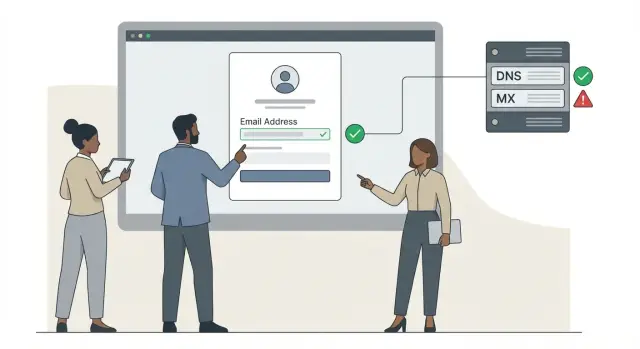
Domain verification is the middle layer. It usually confirms the domain is real and that its DNS settings include mail routing records (often via an MX record check). If a domain has no mail setup, sending to it will almost always bounce.
What it can’t prove: it can’t confirm the exact mailbox exists, that a human owns it, or that the user can access it. A domain can be configured correctly while a specific address under it is still wrong, blocked, or never created.
A practical way to think about it: domain verification answers “is this deliverable in principle?” not “is this user real?”
The checks behind the scenes: domain, DNS, and MX
When someone types an email address, the part after the @ is a domain (like example.com). Domain verification asks one question: does this domain look like it can receive email right now?
Domain exists (DNS in plain terms)
DNS is the internet’s address book. A domain “exists” when that address book has records for it. If there are no DNS records at all, the domain is likely mistyped, expired, or never set up.
Even when a website loads, email can still be broken. Many domains are registered but barely used, or configured only for a site. Email needs its own settings.
Mail is accepted (what MX records tell you)
MX records are DNS entries that tell the world where to deliver email for a domain. If a domain has valid MX records, it usually means it’s configured to receive email.
If MX records are missing, it doesn’t automatically mean the address is fake, but it’s a strong signal the domain isn’t set up for mail (or is misconfigured). For most signup flows, missing or invalid MX is a good reason to block or ask for a different address.
Teams usually align on outcomes like these:
- If DNS is missing, it’s probably a typo or dead domain (reject).
- If MX is present and normal-looking, it’s likely deliverable (accept).
- If MX is missing or broken, it’s likely not set up for mail (block or ask to correct).
- If the domain exists but points to suspicious infrastructure, it’s higher risk (flag or block).
Temporary vs permanent failures (retries matter)
Not every failure is final. Sometimes DNS servers time out or a mail provider has a brief outage. Those are temporary failures and should be retried. Permanent failures (like “domain does not exist” or “no such record”) usually shouldn’t.
What to decide: acceptance rules teams can agree on
Before debating tools, agree on outcomes. Acceptance rules are decisions about what you do when an address looks risky. The goal isn’t perfect detection. It’s consistent behavior that users, support, and reporting can rely on.
Most teams do well with three actions:
- Allow: proceed normally.
- Warn: let the user continue, but add friction (extra confirmation, reduced limits, or a clear prompt to switch emails).
- Block: stop the signup or require a different address.
Define “warn” in one sentence so it doesn’t turn into a grab bag of exceptions.
Where to draw the lines
A simple starting point is mapping common cases to one action:
- Disposable email domains: usually block (or warn if you serve privacy-focused users).
- Role accounts (support@, sales@, admin@): often warn, since they can be shared and harder to tie to one person.
- Free providers (Gmail, Outlook): typically allow, unless you’re strictly B2B.
- Corporate domains with no working mail setup (no MX): block, or allow only after the user verifies by email.
- Unknown or new domains: allow but monitor, or warn if fraud is a known issue.
Once you set these lines, implement the same logic everywhere the email enters your system (signup forms, invites, CSV imports, partner portals). Inconsistent rules are a quiet source of support tickets.
Regional and language realities
If you sell internationally, “free provider” is often local. Blocking unfamiliar regional providers can cut signups in specific countries without anyone noticing. Decide whether your rules are global or market-specific, and who owns exceptions.
Write down the trade-off, too. Stricter rules reduce fraud and bounces, but they can also block real users and increase support load. Looser rules boost conversion, but may raise fake signups and damage deliverability. If that trade-off is documented, product and marketing will measure success the same way.
Step by step: set domain verification rules for signup
Make rules consistent everywhere
Use the same validation logic across forms, invites, and CSV imports.
Start by agreeing on what a “good” signup means for your business. Is the priority fast activation, fewer bounces, better lead quality, or lower fraud? If product wants fewer support tickets and marketing wants better deliverability, put those goals in writing. Otherwise the rules will change based on whoever complained last.
Then choose outcomes that match real risk, not gut feel. A simple pattern is:
- Accept for normal, deliverable domains.
- Warn for shaky cases where you want the user to try again or confirm later.
- Block for clear high-risk cases (known disposable domains, nonexistent domains, domains with no working mail setup).
To keep the rollout manageable, focus on a few concrete steps:
- Pick success metrics (activation rate, bounce rate, trial-to-paid, fraud rate).
- Define your outcomes (accept, warn, block) and where each applies (signup, invite flow, checkout).
- Write user messages that are clear and specific about what to do next.
- Monitor weekly (bounces, conversions, and flagged signups).
- Review rules monthly at first, then quarterly once stable.
Keep messages practical. If a domain fails an MX record check, don’t show “DNS error.” Say: “That email domain can’t receive mail. Try a different address.” If you warn, offer a path forward: “You can continue, but you’ll need to confirm your email to activate.”
Finally, build a feedback loop. Track how often each outcome happens and what those users do next. If “warn” users convert well and don’t bounce, loosen the rule. If blocked users keep appearing in fraud reports, tighten it.
How product and marketing should measure success
Success isn’t just “more signups.” The goal is to keep signup easy for real people while reducing expensive problems later: bounces, complaints, and fake accounts.
Track two buckets side by side: top-of-funnel volume and downstream quality. If conversion goes up but bounces and complaints spike, you didn’t win.
Metrics most teams can review weekly:
- Signup conversion rate (visit to account created)
- Activation rate (new users who reach a meaningful first action)
- Hard bounce rate on onboarding and campaign emails
- Spam complaint rate and unsubscribe rate
- Fraud and abuse signals (duplicate accounts, coupon abuse, unusual signup bursts)
When possible, tie email quality to money. A small drop in bounces can protect sender reputation, keep emails in the inbox, and reduce wasted spend on fake leads.
To choose strict vs lenient rules, run a simple A/B test for at least one full business cycle (often 1 to 2 weeks). Compare conversion and quality metrics, then decide based on net impact, not one headline number.
Common mistakes and traps to avoid
Most problems with email checks aren’t technical. They’re policy problems. A rule that sounds safe can block real customers or let junk through.
A classic mistake is confusing a format check with real validation. A regex can tell you whether an address looks like [email protected]. It can’t tell you whether the domain can receive email or whether the address is likely to bounce. Domain verification focuses on what happens after the @ sign, not just the shape of the text.
Common traps:
- Blocking all free email providers by default (often kills signups for students, small businesses, and evaluators).
- Treating temporary DNS issues as permanent failures (creates false rejections).
- Stopping at syntax checks (you’ll still accept typos and domains with no mail setup).
- Letting disposable domain lists go stale (they change quickly).
- Using vague errors like “Invalid email” (users don’t know what to fix).
A simple example: someone signs up for a trial from a coffee shop Wi-Fi. A DNS lookup times out once. If your system blocks immediately, you just lost a real lead to a network hiccup.
Better defaults reduce fraud without punishing good users:
- Retry or soft-fail on timeouts, and hard-fail only on clear signals (like a nonexistent domain or no mail routing).
- Allow free providers unless you have data that says otherwise, and make exceptions easy.
- Keep disposable detection current.
- Write error messages that explain the next step (for example: “We couldn’t verify this domain right now. Please try again or use a different email.”).
Edge cases you will see in the real world
Lower fraud at signup
Reduce fake accounts by flagging high-risk domains during registration.
Most signups are simple. The tricky part is handling cases where domain verification can’t give a clean yes or no, even for a real person.
International and less common domains can surprise teams. Customers may use country domains (like .de or .br) or newer domain endings. Some domains use non-Latin characters (IDNs), which can look odd in logs but are still valid.
New domains are another common edge case. A startup can buy a domain today and start collecting signups before DNS changes fully propagate. For a few hours, the same domain can look valid from one region and missing from another.
Corporate domains can also be unusual. Some large companies use split DNS (different answers depending on where you are) or locked-down setups that don’t look typical.
You’ll also see intermittent lookup failures. Users behind VPNs, corporate networks, or aggressive security tools can trigger temporary timeouts. That’s not the same as a bad domain.
When a tool returns “unknown,” it usually means “could not confirm right now,” not “fake.” A practical policy is:
- Retry once or twice within a short window.
- Allow signup but require email confirmation before activation.
- Block only when results are clearly invalid.
- Flag risky cases (like likely disposable providers) for extra verification.
- Log “unknown” separately so you can spot patterns.
Quick checklist before you ship new rules
Before changing signup rules, make sure everyone agrees on what “good” and “bad” look like. A small tweak can move signups, trial-to-paid conversion, and deliverability in different directions.
Pre-launch checks
Test rules on a sample of recent signups (including good customers and obvious junk). Keep notes on what you would block and why, so the team can review the trade-offs.
- Confirm the domain can receive email (domain exists and has working mail routing, often proven by an MX record check).
- Decide how you’ll handle disposable and high-risk domains (block, warn, limits, or extra verification).
- Decide how to treat role addresses like info@, sales@, support@.
- Define what you do with uncertain results (timeouts and temporary DNS issues).
- Confirm you can measure impact (bounce rate, spam complaints, trial activation, “wrongly blocked” reports).
Make the fallback plan explicit
Most arguments happen in the gray area, not the obvious fakes. Write down the fallback path for uncertain cases and who owns the decision when metrics conflict (marketing wants fewer bounces, product wants fewer blocked real users).
A simple example: aligning on rules for a trial signup
Add validation in minutes
Add RFC-compliant checks, MX lookup, and disposable detection with a single API call.
A B2B SaaS team sees trial signups up 18% month over month, but sales reports that “new leads” aren’t replying. Marketing sees bounces climbing, and product finds many accounts created with throwaway addresses.
They tighten their rules without killing real signups.
First, they pick a clear starting policy: disposable domains are blocked at signup. Role accounts (info@, sales@, support@) are allowed, but the form shows a gentle warning: “For a faster setup and account recovery, use your work email.” Product owns the UX and wording, marketing owns tone, and sales defines what counts as a useful lead.
After two weeks, they review results together. Conversion drops slightly, but bounce rate drops significantly. Fake accounts in the first 24 hours fall, and sales reports fewer dead ends even if total volume is a bit lower.
They adjust based on evidence. Marketing tweaks the message to reduce friction. Product adds a clearer “Try again” hint when an address is blocked so real users don’t get stuck. They also add monitoring so changes don’t go unnoticed: weekly counts of blocked disposable emails, bounce rate, trial-to-activation rate, and the share of signups using role accounts.
Next steps: document, roll out, and keep rules current
Treat your rules like a product decision, not a one-time tweak. When product and marketing agree on outcomes (fewer fake signups, fewer bounces, fewer support tickets), it gets much easier to decide what to block and what to allow.
Write one shared doc that anyone can understand:
- What “pass” and “fail” mean for domain verification
- What happens on fail (block, warn, or allow with friction)
- Known exceptions (partners, big customers, internal domains)
- Who can approve changes and who owns the metrics
- A few concrete examples and the expected result
Roll out in stages so you don’t cut off good users:
- Week 1: warn only and log failure reasons
- Week 2: block obvious bad cases (nonexistent domain, no mail server)
- Week 3: tighten disposable and higher-risk signals
- Ongoing: review false blocks and add targeted exceptions
If you want to run these checks through a single service, Verimail (verimail.co) is an email validation API that combines RFC-compliant syntax checks, domain verification, MX record lookups, and real-time disposable/blocklist matching, so you can apply the same rules across your form and backend.
Set a simple reminder (monthly works for most teams) to review bounce rate, signup completion rate, and how many users were warned or blocked, then adjust based on what the data says.